Tuesday, March 29, 2016

Starting to Build a Goat Shelter


We've been talking about getting goats for a little over a year now.  Kayla has really been pushing the topic, probably because she's getting older and the longer we wait, less of her childhood will be spent with them.  It took a little convincing, but once Tim came to terms with the idea, he was just as excited as Kayla and I were.

After months of research and talking with our new farmer buddy in Lebanon who breeds the goats we're going to pick up- we think we covered just about all basis.

Goat behavior
Goat diet
Best food brand for goats
Goat's favorite treats
What goats like to play with
Personality of different goats
Goat breeds
Breeding goats
Milking goats....

yea, we pretty much had everything covered and were ready to get going...


oh! Goat HOUSING!  We couldn't possibly bring baby goats home without proper shelter!

Build a goat barn you say?  No problem, my husband is a genius and can do all things, including building a goat shelter.  And that's just what we're going to do!

A trip to the barn to see what we had for lumber and a few items at Home Depot and we got the start of what will be an awesome structure.  Too bad its super cold out and it's going to SUCK being outside putting this thing together.    We went back and forth about where the best spot for them would be. I wanted them out front so they were the first think you saw pulling up the drive. Tim liked the idea of them being out back so all summer long when we're hanging by the pool we can enjoy them.   So guess what we ended up doing?   Nope, usually I get it my way, this time Tim had the final say, and as much as I HATE to admit it- he was right (just this one time in 17 years of marriage haha).  We decided to set up shop out back and get the construction on its way.  It looks a little lifeless as everything is still very dead and brown, but once the spring comes and we have GREEN it'll be a great little goat home.

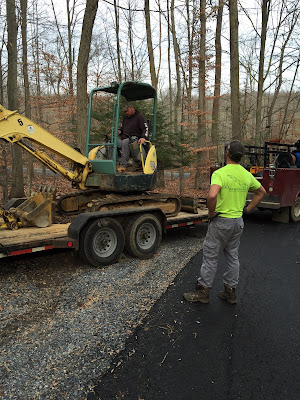
Before we actually began, we had taking several large trees down out back the week before.  We had to cut the center of the logs out to allow a pathway for the John Deer to make it back and forth with materials for the new structure we were going to build. Luckily, Tim wears many hats, this day he was a lumberjack.


 Here they come with the tools we need to get rocking and rolling!


This is the spot!  Perfect view of the house and pool.  Time to dig up some big rocks to make the area nice and clear for our new structure!


                                     We know who's REALLY doing all the work here...


  Here's a shot that actually has me in it, hard to tell from all my photos but I was equal parts in                                   building this thing.  Getting anyone to snap photos is usually a chore.


                                           Kayla stepped up and gave her dad a hand.


                          She looks thrilled, doesn't she? haha, she'd kill me if she ever saw this post.


And the framing is just about done! 


Saturday, March 26, 2016

Goodbye Rotten Railroad Ties, Hello Gorgeous Stone Wall!


We didn't realize how bad the side retaining wall was rotted out when we moved in.  Last summer, I did some yard cleaning and decided to tackle the job of raking out under all the huge rhodedendrons we have.  I could hardly get my rake under them they were so overgrown and encroaching on that entire hillside.

Didnt take me long- I had Tim fired up with a chainsaw in hand ready to clean it up.  We took two trees out that were so poorly grown, they were just an eyesore.  After taking all that out it really opened up the space, but then we were left with a total nighmare... rotten retaining wall.  We actually had rhoadie roots growing out of one of them and it was pushing it so far off where it should be, the hillside was starting to cave.   We ended up with a much larger project than we had anticipated, although that seems to be the norm around here anymore. It's like peeling away one layer and find another that needs peeled beneath it and so on.

We decided to take out the railroad tie on the bottom as it was damaged the most and replace it with a stone wall.  The awesome part of it is that we were able to hand gather each and every stone that you'll see in this wall from our very own property- which to us, makes it THAT much more special.  Sure, we could've hired guys to come in with a crew and load of stone and bang it out in a day or two.. and pay upwards of $8000, but we prefer to do these things ourselves as the reward of accomplishment is far greater than the end result.

This took us a little over a week, with a few hours here and there throughout the week after work and a few long days over the weekend. We're tickled pink and love the way it looks.  Can't wait to rip out and replace the upper tier next!


After tree trimming and cleaning up was done, but still has the old retaining wall:


 Start of the new wall going in, looking good hunny! XOXO  We had to dig down, lay waterproofing,                                          back fill with gravel and start laying in the tiers.


These were some of the rocks we dug up, cleaned up and brought down for this wall.  And let me tell you- majority of them were heavy as hell.  Some were so heavy we needed to load em in the tractor and dump em.  This was by no means an easy task.  We agree, however it was well worth our efforts.


 The trash pile we later loaded on the trailer and took to the landfill in Honey brook.  Most of these                    were so rotted out they crumbled and fell apart when we tried to move them.
                                               Glad they're no longer an issue!


And no better way to pat ourselves on the backs when it was complete-then with a cold one.  
CHEERS!


Sunday, February 21, 2016

Back Stairs, Grunge to Gorge


Being that we're a raised ranch, which means we park in the garage at ground level out front, but our living space is upstairs.  That being said, we have a back set of narrow stairs that lead from the garage up into the kitchen.  The stairs we think were an after thought, because they're extremely small and narrow and quite frankly they hog space in the little kitchen- but that's another story.

After trucking up and down these white stairs that looked like they hadn't bee cleaned or cared for in a very long time- I decided to attack them, viciously.  My weapon of choice? The god forsaken paintbrush. (smile)

I decided to do a multi-tone on the stairs and paint the walls a light grey to warm the whole hall up and give life to a once drab space we were in multiple times a day.


                                                                BEFORE:


                                                                   AFTER:


                                               SIDE BY SIDE COMPARISONS


Now for some artwork and quirkiness... will add some finishing touches and update soon.

Saturday, January 16, 2016

Checking Out the Attic


One of the most bazaar things we discovered when we purchased this home, was the attic access, or lack there of.  We searched high and low in every nook, cranny and closet and much to our surprise there just wan't any access to the attic space- at all!    This means that most likely, since the time this house was built no one ever checked in on the attic space to make sure things looked kosher.  This was a really scary thought.

As I mentioned in one of my previous posts, (I believe it was the post about painting the exterior of the home) we were having a major yellow jacket issue near the roof line and there were several large gaping holes with these bees going in and out of the cedar shakes.  My husband grabbed the gauntlet and in he dove.  An hour later, we had a small access panel in the ceiling of one of our bedroom closets and he crawled around up there and discovered all kinds of things- like a HUGE bee colony that was living in our house. Unwanted.

He treated the area, and the outside was addressed so we no longer have these nasty flying stingers occupying our space.  AND we now have access for any future needs.  This actually lit a fire under Tim to start another one of our (MANY) projects- updating the closets.  We had normal drywall on the bedroom ceilings, and it went into the closet space as well, BUT they installed drop ceilings in the closets with a small lighting fixture cut into them that hardly gave off any light- and cut our closet space by about 10" .. which is a LOT when you're talking about an old closet that's not very big to begin with.  You can see where the drywall was painted and where it stopped.  All that unpainted drywall space was hidden beneath a dropped ceiling of panels.

Good bye drop ceilings, hello attic access and beautiful bright recessed lighting! My closet is up next!  Then it's paint, new closet organizers and some metal tracked wood barn doors- WHICH I CANNOT WAIT FOR!

Updates to follow as they happen..


                                                                  BEFORE:


DURING:


AFTER:

Just needs finishing touches!


Tuesday, December 15, 2015

Drilling A New Well (part 1)

You know that feeling when you hop in the shower on a cold night after working outside all day? It's amazing, right?  All hot and steamy, as you let the hot beads of moisture penetrate through your skin... ok, get your head out of the gutter, that's not where I'm going with this.   I'm talking about the thing we use every day and take for granted- hot water. Or how bout water period?!

Now picture that same scenario, but you're in the shower all hot and steamy and lathered up with soap and something major happens. The water starts to trickle... and trickle.. and eventually trickles no more.  

That's what just happened to Tim...  And it wasn't a pretty sight around here, let me tell ya.  He was freaking out, yelling and questioning everyone "who used all the hot water, better yet who just used all the water?  Who did laundry, took showers and ran the dishwasher?"..   sadly it wasn't like that.  Yes, we used the water in the house like we did every day, but for some reason this time- we ran dry. yes DRY people.  We ran our well DRY. You can imagine the feeling of disaster when you think you have no water left in your well.  

Well, it took several hours, but our well eventually filled and we were able to get water out of the faucets again, but we realized that something needed to be done- quickly.  We had some contractors out who used to service this house prior to our ownership and much to our surprise, we learned that the well had actually run dry previously.  Of course this was never mentioned to us before, so we were upset and that's just a whole other can of worms that I'm not even about to get into in this post.  Let's just say it was best to just move forward with correcting the matter at hand.   After several contractors out to the house, we decided to get a new well drilled for better water flow and accessability.  The well we have now is only drilled a little over 100 feet deep. This is not the best set up for a family of 5.  We had our buddy Tom Smith out with his excavating equipment to dig our hill out for the drill to access freely.  Say hi to Tom:


Now we're all ready for Mills to come drill our new well!

To be continued...


Saturday, October 17, 2015

One of the Prettiest Times of the Year, Fall

I was looking around and couldn't happen to notice all the different colors around us, from the leaves changing on all the different types of tress, to the changes in flowers.   I wanted to share how pretty it really is up here in these woods.  This was taken while I was enjoying a cup of coffee this morning sitting on the swing under the old pine tree and having a "me moment" (which doesn't happen too often).  It's slightly difficult to see in this photo, but we have a red maple that's to the far right of this photo that is absolutely gorgeous this time of year.  It's crimson fire among the golden rays of the oak trees behind it.

Ahhhhh... nothing like a hot cup of coffee on a brisk fall morning.  Love our house.
Happy Saturday Morning, Y'all!


Thursday, July 30, 2015

Butthole Brown to Glam Grey!


So one of the (many) things we knew had to be done when we moved into this place was painting the exterior. W have wood siding that's painted  To maintain, the siding should be repainted every so many years to hold the life and look of the paint.  The paint was peeling and flaking in a lot of areas when we purchased the home so a summer paint job was in the books!

Excitedly, I decided I could tackle this job on my own- being an expert novice painter and all...   I like to think I'm a pro, but a pro I am not.  Tim says he sucks at painting- truthfully I think he just says that and plays dumb so he isn't stuck doing the tedious work with the pale and brush.  He's either really selfish or one smart cookie. I think he's a little of both, but shhhh dont tell. ;)

Our house is literally butthole brown, if there is even such a thing.  Picture this- take coffee, add cream, a little mustard, ketchup, wasabi, more cream, hell throw in a half gallon of ben & jerry's chunky monkey and blend well...   or you can just bend over bare assed and look in the mirror- either way, the color you find is literally the color of our house. Shit brown.  It's dull, lifeless and screaming for a makeover!

Without much thought, grey became the new color of choice. Glam Grey as I call it because it gives our house that special pop of wow now that it's painted with a fresh updated color choice.  I had considered long and hard about changing our trim color from white to a beige, but that would involve me climbing onto the roof and up a ladder- which I do not do with my deathly fear of heights.. so white it remains (at least for now).

Check our some of our before, during and after shots of the exterior. The exterior isn't fully complete just yet, we're getting new garage doors, adding to the exterior trim and will be adding window shutters. But at least the hard part is over with.   This project took me a good 2 months to complete, few hours here and there at a slow pace when I wasn't working (or grocery shopping, or cleaning, or doing laundry, or running errands, you get my point.  I am woman, hear me roar!).

BEFORE: *this was the look of the house before we bought it.  This is the truest contest of what it looked like before.
 And here's the wooden walkway before it got a facelift. More shit brown.


DURING:


Ok, so I know I said that I was tacklilng this job by myself... and I did, for the most part. But as I also mentioned before- me and heights clash like a good bottle of champagne and a cheap hooker. I am jus too scared to be up high on a ladder or even hanging over the deck railing looking down- I start to see double and get all weak in the knees.  So I had to rally up the troops (and by troops I mean my kids and brother again) and put them to work.  Thankfully Kayla was in a good mood this day (she's 16- need I say more?)   Notice the shit brown flooring?!  And notice how it's peeling and cracking?  Exactly why it needed to be overhauled!!


So here's my big baby brother, Jon up on the extension ladder taking care of the high spots for me.  Funny story, I have to share.  So if you look above Jon's head you'll see the cedar shakes.  At the bottom of those shakes there's a few large holes. Coming in and out of those holes are yellow jackets.  This photo was taken right when Jon discovered there were bees buzzing around his head. Jon, for those of you who don't know is a big baby when it comes to things like bee stings.   When he realized the bees were nesting above where he was working he was like F this, I'm out.  Literally as soon as he said that a bee started buzzing around his face, he got nervous, lost balance and dropped the bucket of paint below him.  I REALLY wish I had this all on camera because it was so funny when it happened.  He swatted at the bee and of course we all know what happens when you piss a bee off!  BZZZZZ ... STING!   And when one thinks they're being threatened, they all start attacking!  Long story short, Jon took a few for the team this day, getting stung on the arms, neck and shoulders.  He lived. 


Not too often you'll find me in the photos means I"m the man behind the lens most of the time, but this was me- literally shaking in the knees because I felt like I was up too high.  You can clearly see my brother is standing next to me and I was only up about 5 feet.   hahahaha


Part of painting the extior involved painting the cute little wooden walk to our front door.  If you forget, that used to be shit brown also.  Actually it was dark shit brown.  The same color as a lot of the trim.  I ended up mixing up my own floor color with a little siding and white and came up with this gorgeous light grey that really brightened the whole thing up!

So here it is, the finished product!   Take a look and comment below.