Saturday, July 30, 2016

Container Gardening


The Dream
It is a dream of mine to one day have a big garden, fenced off from pests and unwanted animals, plush with greenery, vibrant color and unlimited amounts of bounty.  I was never a big gardener as a kid or when I was in my young adult life, and maybe it's because I was always so busy and never really had the time or patience to put into a garden that it requires.  As I've gotten older and my children have grown, I find myself drawn to the more simple things in life and appreciating more relaxing enjoyable life moments, gardening being one of them.

Container Garden
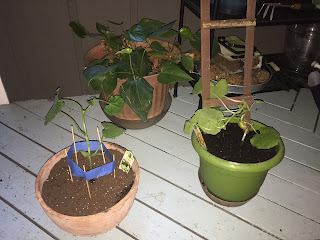
I had plans to till the soil and put in a nice size garden out back this spring. Unfortunately, our well wasn't drilled when we thought it would've been and knowing the yard was going to be a complete mess with machinery where the garden would've gone made the idea of putting it in this year out of the question.  I was slightly disappointed but I resulted in what my mom used to do - container gardening!  I used various containers and pots that we had laying around the farm already and added a few new ones. Together they look great as I prefer nothing to match anyway.

Plants in the Garden
I purchased all of our herbs and veggies from the Kimberton Whole Foods store as they only sell organically grown plants.  I used several large bags of organic potting soil - which is nearly double the cost of the regular soil, but I felt it was worth the $ knowing the produce we grow would be 100% organic and safe for my family to eat.    I put in several tomato plants of different varieties including romas, early girls, and I even did the sun golds which tend to be a favorite around here.  The romas seem to be doing the best out of all the plants so far- and Im sure they'll all ripen around the same time but Im planning on making a huge batch of homemade sauce to can so I'm really excited. In addition to the tomatoes, I planted red peppers, orange peppers, spaghetti squash, cucumbers, strawberries, mint, oregano, lavender, sage, basil, chives and parsley.  The containers are all sitting on the patio by the pool and they actually look great. They get plenty of sun and give the patio some life.  Behind the containers in a small patch of grass I even planted a few rows of sweet corn and a few watermelon plants as well.  I purchased two fruit trees from a home grower about an hour away from the farm. We have a fig tree which is growing small figs that'll be ready for harvest this early fall and a peach tree which has about a dozen peaches growing and hopefully will be ready to eat at the end of the summer.

Every day I nurture the garden; watering, training and loving the plants as if they were my own children.  I cannot wait to harvest a big bounty of fruit in the next few weeks!.  Will share more photos of the garden after it's full of color. Here's some photos of the process and how the garden looks today


Seeds, Seedlings and Potting


Fruit Trees are Here!


Potted Seedlings & Herbs


Container Garden is Ready for Growth!


Cute little DIY Garden Markers


Growing Nicely & Baring Fruits!


Here's How it Looks Today!


Thanks for Reading!


Drilling A New Well (Part 2)


After a long winter and spring with little to no water pumping through the well, we waited patiently for the ground to thaw, and dry out after months of heavy rain this spring.  The drilling company was finally able to bring their rig up and drill!  Tim couldn't have been happier seeing that thing go to town.  Our old well was only 100 feet deep, but this baby is 350 feet in the ground and we went from getting a gallon of water every several minutes to 12 + gallons per minute!  We'll never run out and with the new pressure lines we have water pressure than most people have with public water so we are super happy.

Shout out to Mills Drilling for not only taking on the dreadful task of drilling up here (we interviewed several drilling companies who truthfully didn't want the responsibility of bringing their equipment up on this hill) but for seeing the job through and providing us with an excellent product. Couldn't be happier!

Here's some photos of the before, during and after.

This is an old photo but you can see the well cap was smack n the middle of the rear yard. This caused issues when the kids wanted to have a catch or if we ever wanted to expand out back.  It was also an eye sore.


Last fall, with the guidance of the drilling company, we chose a new location out of the way, up on the hill out back so it would no longer be an eye sore.   Both Tim and our buddy, Tom from Ron Smith Excavating dug the hillside out so the rig had a nice flat area to drill.


Here's some of the photos of the mess out back and digging out new lines to the house. You can see it was a group effort in getting this done on a day that was extremely hot and humid. 


Here's the rear yard now with the old well cap gone, the area has been graded and we have grass seed and straw laid to get the grass to grow back.  Can't wait to utilize our new rear yard!


Wednesday, June 29, 2016

Our ducklings are Getting So Big!


Hard to believe just a few weeks ago these little balls of fur and feathers came into this world all bright eyed and bushy tailed.  June has been such a wonderful mama to her youngins.

We sexed them days after they were hatched and chose two females to keep here on the farm, sadly the other 6 we have decided to sell.  We just posted ads for sale, but Im almost 100% certain June is going to be devastated when all her babies are gone (but Katora and Alu).  We are keeping the two separate from mom for now inside a brooder, under the heat lamp and handling them each and every day to build up our trust.  We want our animals to love and trust us so they're more friendly.

Here's a gradual progression of photos from the day they were born, June 5th until today, June 29th.  They're just a little over 3.5 weeks old and it's just remarkable how much they've changed! They're starting to lose the fur and get little baby feathers.  Their wings although small are starting to develop and it's super cute when they flap them.  We've enjoyed every day with these little guys.


First ones to hatch, June 5

June 6

June 6

June 14

June 15

June 23

June 29


June 29

*This is Katora and Alu, the two girls that will be staying here at Indian Springs. They just had a good swim right before we took this photo. They were pooped laying in the grass.  Too cute!


Tuesday, June 14, 2016

28 (more) Duck Eggs to Incubate!


Now that our female call duck June has hatched out 8 adorable little ducklings,  we are left with numerous eggs scattered throughout the yard, the duck house, and in a few other random places.  Not sure which eggs are June's, which eggs are Maggie's, or even which are new or old, we just weren't sure what to do with all of them.  Eggs that are dropped are only so good for so long before they miss their window for incubation. Additionally, eggs that are dropped are only so good for consuming before they go bad too....for all we know, some of these could've been dropped months ago in the beginning of spring. (gagging thinking of the idea of eating rotten duck eggs-barf!)  It's difficult to know for certain because we were just letting Mother Nature hold her course of action with the ducks as we didn't want to do anything to disturb June from sitting by snatching up any remaining eggs out of her nest- ALTHOUGH, if it were up to Tim, we would've been collecting these suckers every day and eating like kings as duck eggs are delish!   Sorry, Timmy... baby duckies are way better then a good meal! haha

After some solid thought, and a brief family discussion (ok, more like me making the decision and everyone rolling with it) we came to the crazy decision that rather than tossing them all out in the garbage or feeding the coons with them, we'd round up all the eggs we could find, cleaned them up and got them ready for the incubator.  Anything we collected up until today we'd incubate. Anything after today- we eat! Fair deal, right?

Well, sort of.. we don't actually have an incubator just yet- but we decided to make this a fun science experiment and make our own out of a Styrofoam cooler. Another post to follow with photos and step-by-step instructions on how we made it. And of course, lots of updates and candling photos to come also as we go through this journey for the next 28 (give or take) days. 28 days is the average incubation period for a duck.

 For now, here's our gorgeous rainbow of blues and grays just waiting to get growing.  All 28 of the that is...   God help us if these all take, or should I say God help Tim as he'll be building another barn!